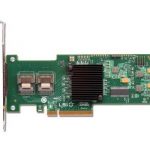
Despite multiple tutorials on this topic being available on the internet, I just spent several hours fiddling around with different FreeDOS images, UEFI shells, flashing tools and firmware versions until I had finally successfully cross flashed my M1015 to a LSI 9211-8i. So I thought I’d just share my experience and maybe save you some time.
Disclaimer: Follow the described steps at your own risk. If you turn your HBA into a $100 paperweight, don’t blame me. I just wrote down what worked for me, which doesn’t mean it will work for you too. Please read all of the steps carefully before attempting anything.
Mainboard used: ASRock J3455M (Celeron J3455 „Apollo Lake“ CPU, UEFI v2.50)
1. Clear original Firmware
1.1 Prepare a bootable FreeDOS USB stick
Create a bootable USB stick using Win32DiskImager (or just dd if you are on Linux/Unix) and one of the FreeDOS 1.1 images published by Christian Taube: http://freedos.chtaube.eu/download/
I tried several other FreeDOS images, including the one provided with Rufus, but the above was the only one I could actually get to boot on the ASRock J3455M.
Update 2023-01-31: The images seem long gone from Christians server and archive.org doesn’t have them either, so you’ll have to look elsewhere.
1.2 Obtain the megarec tool and addidtional files
Download the sas2008.zip archive provided by Pieter over here. Extract it and copy the following files to your FreeDOS USB stick:
- MegaRec.exe
- dos4gw.exe
- DOS32A.exe (not sure if this one is really needed, but copy it anyway)
- sbrempty.bin
1.3 Boot FreeDOS
- Go to the UEFI menu of the mainboard and make sure you have the „Secure Boot“ option disabled and the „CSM“ option (Compatibility Support Module) enabled. Otherwise you won’t be able to boot FreeDOS.
- Plug in the USB stick and start. In the FreeDOS boot menu, select the 4th option: „4 – Load FreeDOS without drivers“. Otherwise megarec will run into a page fault error later.
1.4 Actually clear the original firmware
Run the following commands:
megarec -writesbr 0 sbrempty.bin
megarec -cleanflash 0
You’re done with step 1 now. Power off your system.
2. Flash new firmware
2.1 Prepare the UEFI shell
This part of the cross flash procedure needs to be done from a UEFI shell.
The Arch Linux Wiki has several links to different versions. Although Shell v2 seems to be recommended for mainboards using UEFI v2.3+, you will need to download Shell v1 for the sas2flash.efi software to run. Otherwise you will run into the following error:
InitShellApp: application not started from shell
- Format your USB stick using the FAT32 file system
- Download the Shell_Full.efi file from the tianocore github repository
- On your USB stick, create a folder „EFI“ and within that create another folder „BOOT“
- Copy the Shell_Full.efi file into the EFI/BOOT folder and rename it to BOOTX64.EFI
2.2 Obtain the sas2flash tool and firmware files
To flash the most recent firmware (currently P20), go to the Broadcom (LSI) downloads page for the 9211-8i and download the following archives:
Update 2023-01-23: They seem to have these websites password protected now, you’ll have to google around to find the archives I guess.
From the first one, extract the sas2flash.efi application to the root of your USB stick.
From the second one, extract the 2118it.bin file (from the Firmware\HBA_9211_8i_IT\ subfolder) and the mptsas2.rom file (from the sasbios_rel subfolder) to the root of your USB stick.
The sas2008.zip archive from step 1.2 also includes these files, so you might as well use these, although they are probably an older firmware version (P11 or something).
2.3 Boot the UEFI shell
Plug in your USB stick and power up your system. It should now boot to the UEFI shell command prompt and look like this:
Shell>
Issue the following command to get to the root of your USB stick:
Shell> fs0:
(Depending on the hard disk configuration of your system, the USB stick might as well be fs1:, fs2:, fs3: and so on. You can issue a dir command to see the contents of the current directory.)
The prompt should now look like this:
fs0:>
2.4 Flash the firmware
To actually flash the firmware, issue the following commands:
sas2flash.efi -o -f 2118it.bin -b mptsas2.rom
sas2flash.efi -o -sasadd 500605b0[xxxxxxxx]
Replace the [xxxxxxxxx] with your actual SAS address which can be found on a sticker on the back of your M1015 PCIe card.
(Caution: There are Dell HBAs which can also be cross flashed using this procedure. As far as I know, these don’t have the SAS address printed on a sticker, so you have to determine it using the MegaCli tool before erasing the original firmware. There are instructions on how to do this available elsewhere.)
If you run into the following error…
ERROR: Firmware Host Boot Failed!
… you probably forgot to run the megarec -cleanflash 0 command in step 1.4. (Guess why I know that.)
If both commands have run successfully, reboot.
Voilá, you’re done!

